Bloom is an Email Opt-In Plugin for WordPress. With Bloom, you can easily add opt-in forms to your website and harness complete control over the design and location of each.
Bloom gives you the power to display opt-in forms using integrations of the most popular email marketing systems available like: ActiveCampaign, Aweber, CampaignMonitor, ConstantContact, ConvertKit, Emma, Feedblitz, GetResponse, HubSpot, iContact, Infusionsoft, MadMimi, MailChimp, MailerLite, MailPoet, Mailster, Ontraport, SalesForce, SendinBlue.
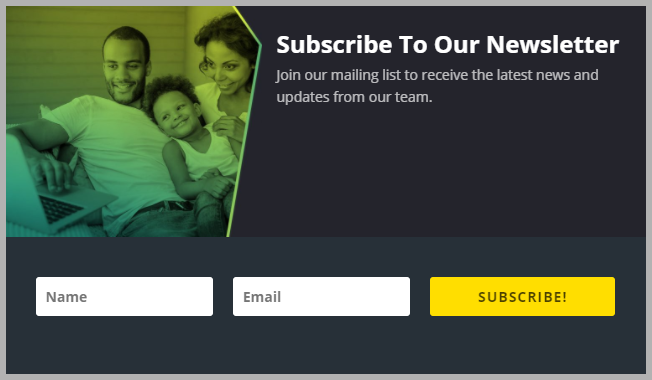
In this post, we will show you how to Add Newsletter Opt-In Forms with Bloom on MovieAsap theme.
Adding Email Accounts
Read more: Adding Email Accounts In Bloom.
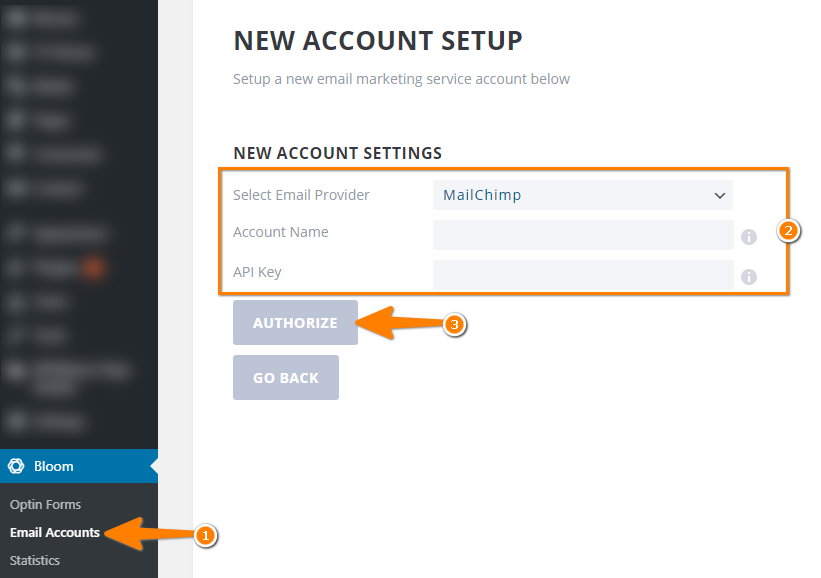
Step 1: Go to your WordPress Admin Dashobard and find the Bloom plugin. Navigate to Email Accounts and click New account.
Step 2: Select the Email Marketing you want to use from the list of providers and proceed with the installation steps.
Step 3: Put your Account Name and API Key into Input fields.
Import Bloom Settings
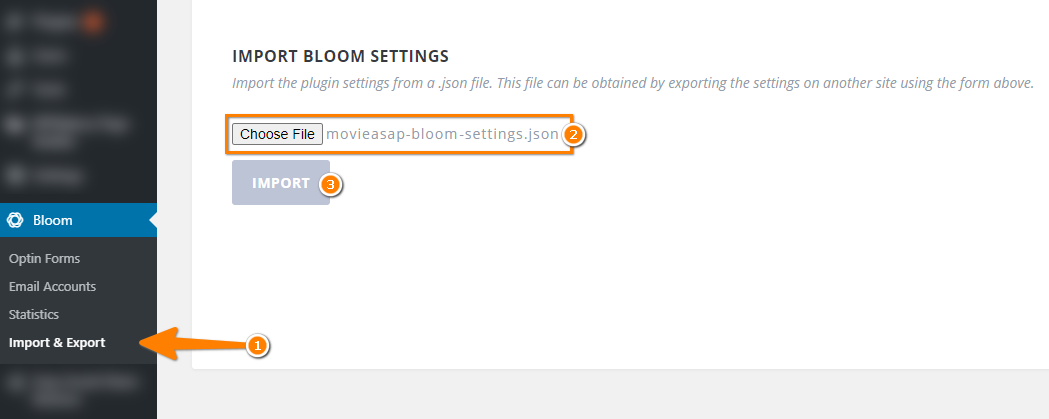
Step 1: After add Email Accounts. Navigate to Import & Export. Choose our Bloom settings file at here. Then click Import.
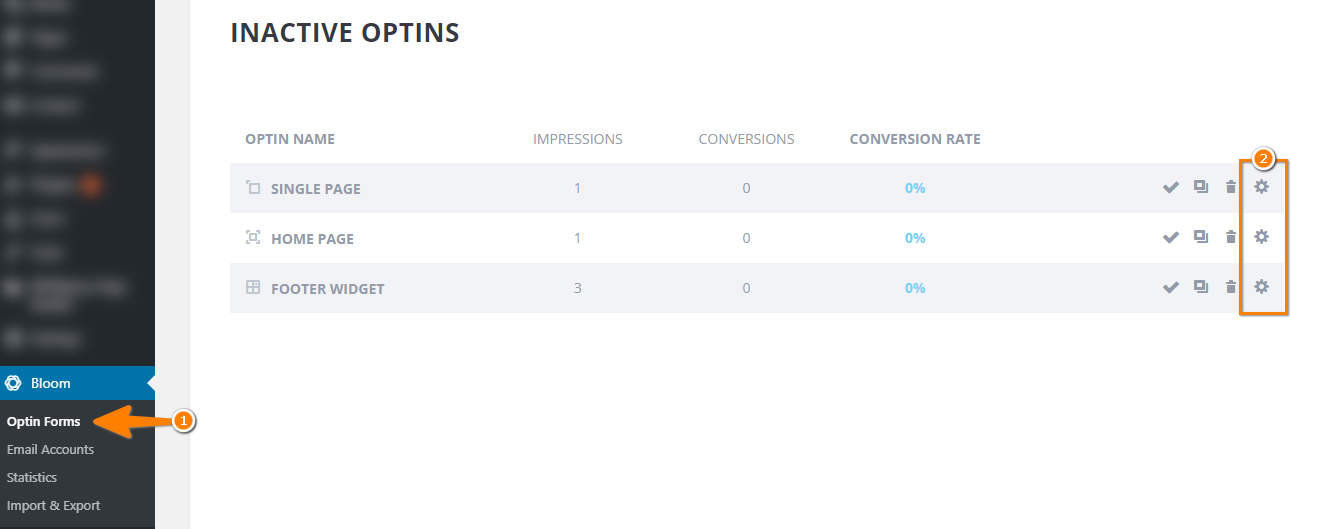
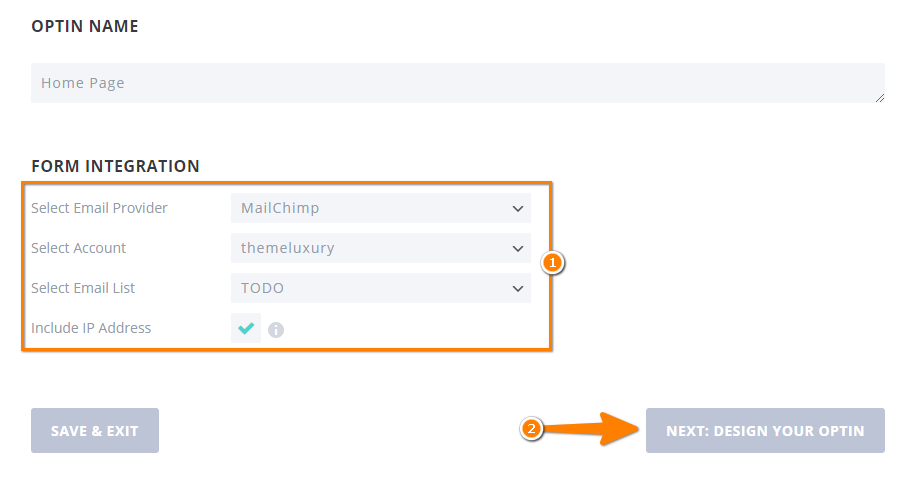
Step 2: Nativegate to Optin Forms. Click the gear icon to edit the form.
Step 3: Set up your form integration. Then, click Next: Design Your Optin.
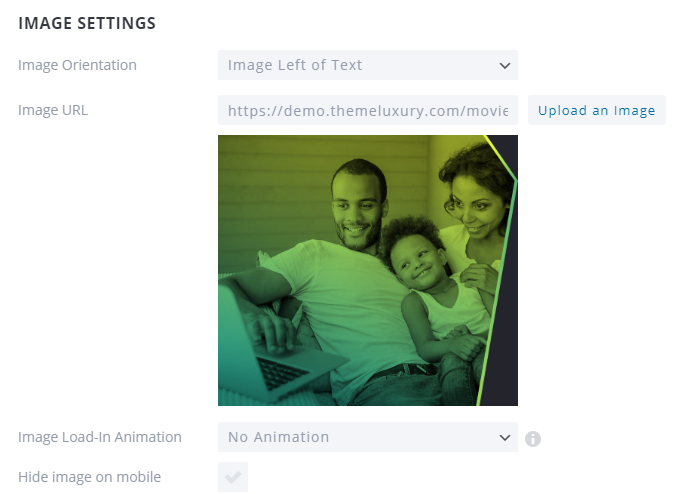
Step 4: Scroll down, you will see Image Settings section. Just change our demo image with the image you want to use. Then click Save & Exit.
In case, you want to use our image. You can find it on movieasap/assets/images.
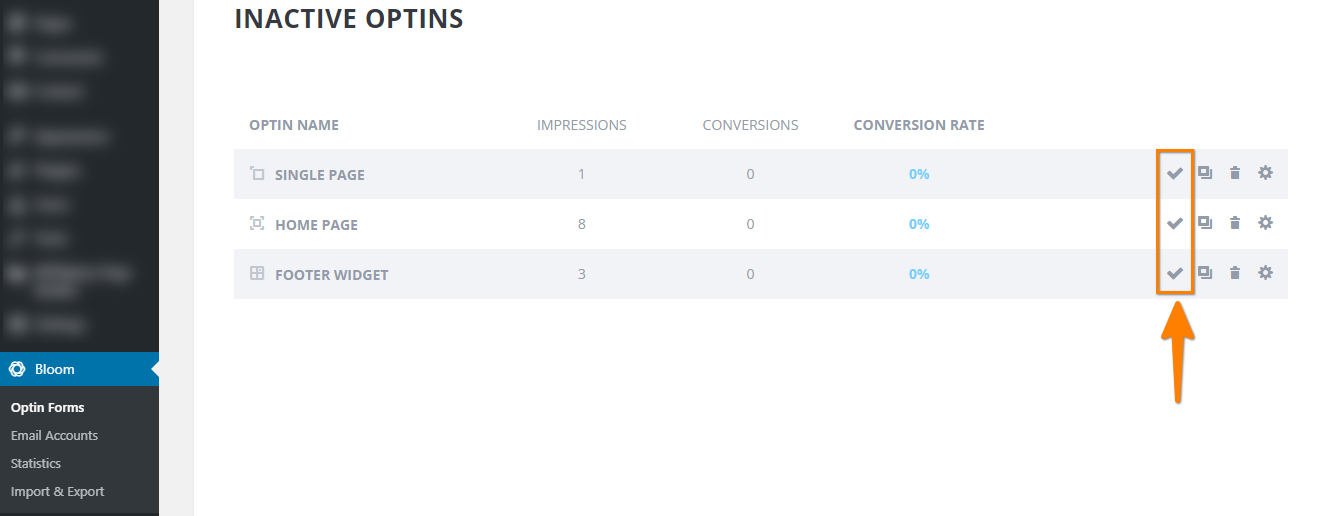
Step 5: Go back Optin Forms. Then, Active your Optin.
That’s all. Happy using MovieAsap!